Showing posts with label pattern. Show all posts

Saturday, March 12, 2022

A new hat pattern! Cables!

Please note:  All my hat patterns are free, in order to encourage donations.  If you post photos of your work, please acknowledge the creator.  Please also look at my other patterns on Ravelry [link].


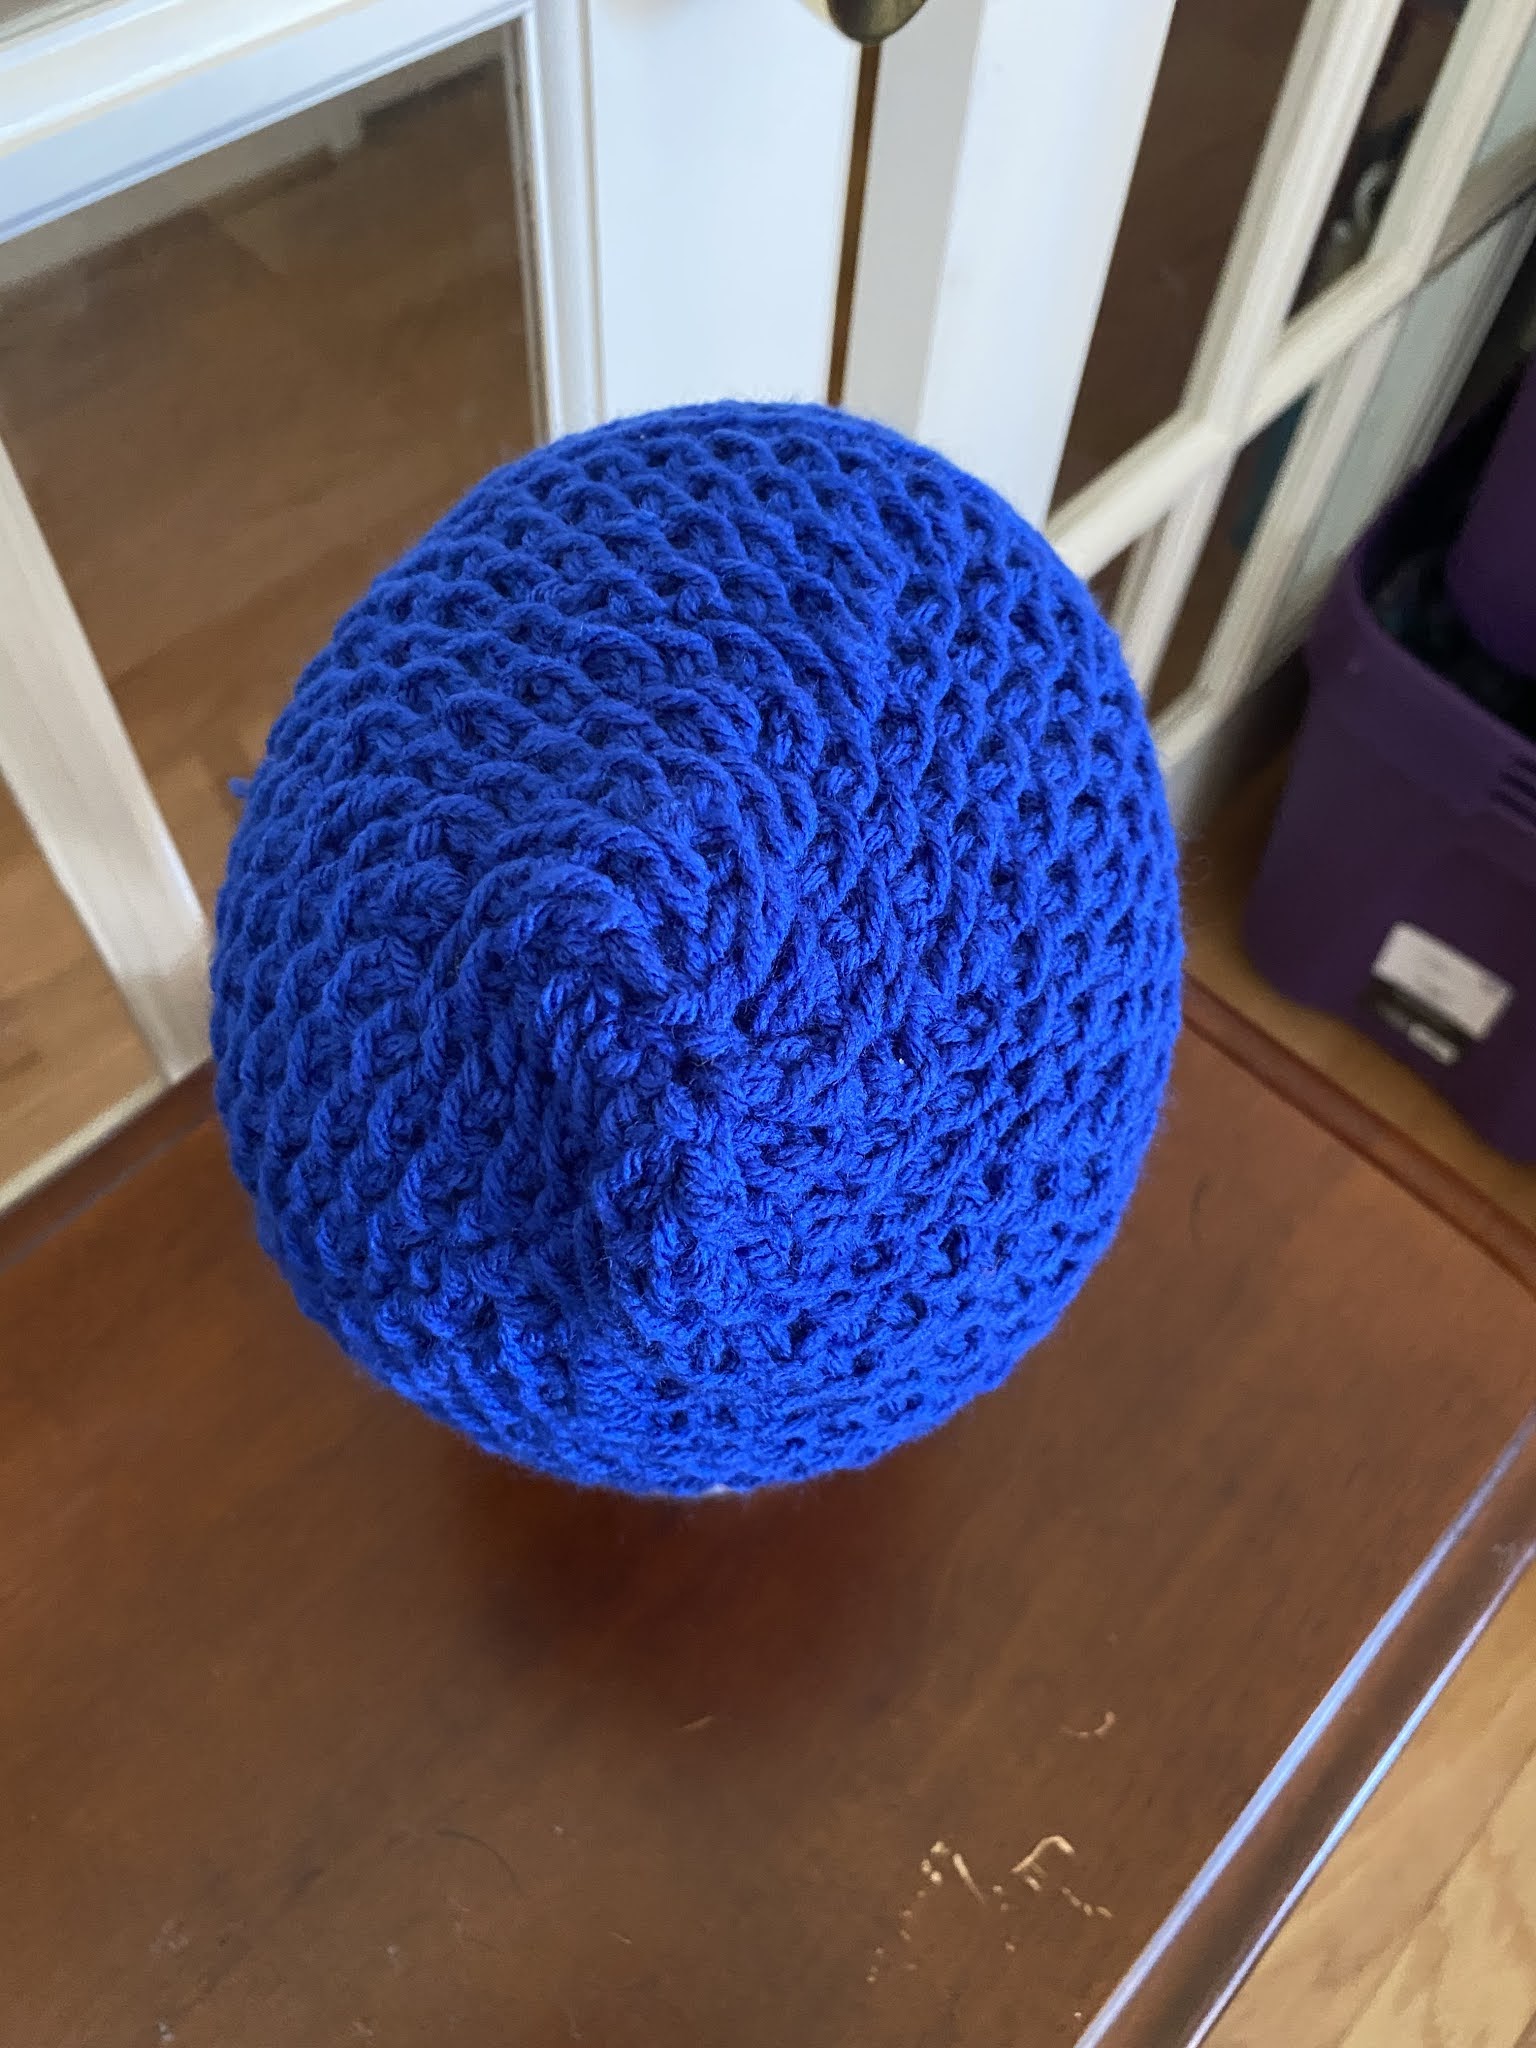
These are two photos with very different lighting of the same hat.

It is assumed the crocheter is familiar with front-post and back-post stitches, as well as crochet in the round.

This hat begins with the first 6 rounds of my ribbed hat pattern, found here [link to pattern, with video tutorial].

  1. Ch 4, slip stitch to make a ring.  Ch 3 (counts as a DC), work 11 more DCs in the center of the ring.  Slip stitch to join (SSTJ).  (12)
  2. Ch 3 (counts as 1st DC), [FPDC around the initial ch st from 1st round; DC in top of next st, FPDC around post of the same st.] repeat bracketed instructions for each stitch.  Join to ch 3 with a SS behind the ch. (24)
  3. Ch 3 (counts as 1st FPDC), DC in top of next FPDC, FPDC around post of same st; [FPDC in next st, DC in top of next FPDC, FPDC around post of same st] repeat brackted instructions until end of round.  SS behind the initial ch 3 to join.(36--FPDC + DC + FPDC for each of the first round DCs)
  4. Ch 3 (counts as 1st FPDC), DC in top of next DC, DC in top of next FPDC, FPDC around post of same st; [FPDC in next FPDC, DC in next st, DC in top of next FPDC, FPDC around post of same st] repeat bracketed instructions until end of round.  SS behind the initial ch 3 to join. (48--FPDC + 2 DC + FPDC for each of the first round DCs)
  5. Ch 3 (counts as 1st FPDC), DC in top of next DC, FPDC in next DC, DC in top of next FPDC, FPDC around post of same st; [FPDC in top of next FPDC, DC in next st, FPDC in next DC DC in top of next FPDC, FPDC around post of same st] repeat bracketed instructions until end of round.  SS in top of ch 3 to join. (60--FPDC + DC + FPDC+ DC + FPDC for each of the first round DCs)
  6. Ch 3 (counts as 1st DC), FPDC around ch 3 below, DC in next DC, FPDC in next FPDC, DC in next DC, FPDC in next FPDC; [DC in top of next FPDC, FPDC in same FPDC, DC in next DC, FPDC in next FPDC, DC in next DC, FPDC in next FPDC] repeat to end of round. (72--DC + FPDC + DC + FPDC+ DC + FPDC for each of the first round DCs) 

    End of increase/beginning of side
  7. Ch 3 (counts as 1st DC), DC in each st from row 6. SSTJ.  It is very easy to accidentally add or remove stitches in this row. Count carefully. 
  8. Ch 3 (counts as 1st DC), DC  in next 2 DC, FPDC in next 9 DC; [DC in next 3 st, FPDC in next 9 st] repeat to end of round. SSTJ  The same advisory from row 7 applies. If the count is off at the end of the round, find the error and fix it.  
  9. Ch 3 (counts as 1st DC), DC in next 2 DC, sk 3, FPTC in next 3 FPDC, FPTC in the 3 skipped FPTC working behind the 3 FPTC just worked, DC in next 3 FPDC; [DC in next 3 DC, sk 3, FPTC in next 3 FPDC, FPTC in the 3 skipped FPTC working behind the 3 FPTC just worked, DC in next 3 FPDC] repeat to end of round. SSTJ
  10. Ch 3 (counts as 1st DC), DC in next 2 DC, FPDC in next 9 stitches, being sure to catch all of them; [DC in next 3 DC, FPDC in next 9 stitches, being sure to catch all of them] repeat to end of round, SSTJ
  11. Ch 3 (counts as 1st DC), DC in next 2 DC, DC in next 3 FPDC, sk 3, FPTC in next 3 FPDC, FPTC in the 3 skipped FPTC working in front of the 3 FPTC just worked, ; [DC in next 3 DC, sk 3, FPTC in next 3 FPDC, FPTC in the 3 skipped FPTC working behind the 3 FPTC just worked, DC in next 3 FPDC] repeat to end of round. SSTJ
  12. Repeat row 10.
  13. Repeat rows 8 - 12.

    Turn-up brim
  14. Turn work;  SS behind the ch 3 below, ch 3 (counts as a FPDC); FPDC in every st to end of round.  SS behind the initial ch 3 to join.
  15. Ch 3 (counts as 1st FPDC), FPDC in each FPDC below.  SS behind the initial ch 3 to join.
  16. Repeat step 15 if desired.  Tie off.

    Alternate edging
  17. Work 2 or rows of SC in every stitch.  Tie off.

Sew in loose ends.  Bribe someone to pose for Instagram photos.

(c) David Browning 2022

Monday, November 29, 2021

Updated: Crochet Hat With Ribs!

Please note:  All of my hat patterns are free to encourage people to make donations. Please use them as you like, but credit my pattern if you publish photos. Please also look at my Ravelry store for other patterns:  David Browning Designs


This is an update to this post:

I'm not talking about barbecued ribs today, but with the ribbing effect that can be achieved when crocheting in the round.  I assume everyone knows how to do normal crochet in the round, but if you don't, here is a tutorial:


To review, I start with a circle of 12 DCs, which is the most common starting round I have seen.  Each of those 12 DCs is the point of a wedge--in the second round there are 2 DCs, in the third round 3 DCs, etc., each emanating from the initial DC.  That is how the required increases to create a true piece in the round are accomplished. 

Let us assume we want more texture, perhaps a texture to go along with the stitch that is used on the side of that hat.  Here is one way to accomplish that.

  1. Complete your initial ring of 12 DCS. I don't care how the ring is accomplished--magic ring, ch4, ch2 and use the 1st ch as your ring--that's just you crocheting. Slip stitch to join (SSTJ) with the initial DC or initial ch3 that substituted for a DC.  (12 st)
  2. For round 2 we need 2 stitches for each stitch below. Ch 3 in the top of the 1st DC (or ch3), then FPDC in the post of the same DC.  Repeat for each DC in round 1.  SS behind the ch3 to join. (24 st)
  3. Ch3, which counts as 1st FPDC. In FPDC from 1st wedge below, DC in top of the st, FPDC in post of same st.  For each succeeding wedge, FPDC in 1at st, DC + FPDC in 2nd st.  Each wedge has the pattern FPDC-DC-FPDC. SS behind the 1st ch3 to join.  (36 st)
  4. Ch3 (counts as FPDC), DC in next st., DC in top of next st., FPDC around post of same st.  Repeat for each wedge.  Each wedge has the pattern FPDC-DC-DC-FPDC.  SS behind the initial ch 3 to join.  (48 st)
  5. Ch3 (counts as FPDC), DC in next st., FPDC in next DC, DC in top of next st., FPDC around post of same st.  Repeat for each wedge.  Each wedge has the pattern FPDC-DC-FPDC-DC-FPDC.  SS in top of the initial ch 3 to join.  (60 st)
  6. Ch 3 (counts as DC), FPDC around post of same DC/ch3, DC in next DC, FPDC in next FPDC, DC in next DC, FPDC in next FPDC.  Repeat for each wedge.  Each wedge has the pattern DC-FPDC-DC-FPDC-DC-FPDC.  SSTJ in the manner appropriate for the next round, which should be without any increases at all.
Since this pattern can be used with any yarn and an appropriate hook for that yarn, the number of increase rounds will vary to create a crown section the right size. The green hat pictured used a bulky yarn and an 8mm/L hook, so it did not require the same number of increase rounds as the blue hat.

You can now continue with the ribbing for the entire vertical portion of the hat by working FPDCs in every FPDC and DCs in every DC. You could execute a rice stitch by alternating FPDC and DC in every other stitch, then DC in every FPDC and FPDC in every DC from the previous round.  The choice is entirely yours!

End with 1 or 2 rows of SC.  Tie off.


Rice stitch at with ribbed top

Ribbed hat

Saturday, July 31, 2021

New pattern: The Gia Hat


Please note: I make all my hat patterns free of charge to inspire crocheters to make hats for charity, particularly for Hat Not Hate. Please feel free to redistribute this pattern, so long as you include this note and credit the pattern creator. Please visit my Ravelry store and consider purchasing a pattern that is not free.

This hat was created using Ice Yarn Macaron generously supplied by Gia at YarnNut.com, so of course I had to name it for her. Macaron yarn is labeled as a 3, which we in the US would call a DK, but I think it is more a 4, if not a 4.5. This pattern will work with any worsted or chunky (4 or 5) yarn and an 8 mm/L hook. If you choose a lighter weight yarn, you will likely have to adjust row counts and hook size.

My wedge terminology works perfecctly well with this hat, even though the top is done with HDC instead of DC. For more information about my wedge terminology, see this video.

For a larger hat, add a 6th increase round at the top and/or repeat rounds 7 & 8.

Yarn: Any worsted or chunky, such as Ice Yarns Macaron. Solid colors work well, as would some but not all variegated yarns. Self-striping yarns should change colors fairly quickly. Manual color control is also an option to created a striped effect.

Hook: 8 mm/L

Stitches:

Single crochet (SC)
Back-loop single crochet (BLSC)
Hafl-double crochet (HDC)
Double crochet (DC)
Front-post double crochet (FPDC)
Slip stitch (SS)
Slipt stitch to join (SSTJ)


Method:

  1. Ch2; work 9 HDC in the 1st ch; SSTJ with 1st HDC.  (Alternately use the magic ring or a ring of chain stitches--use what works for you.) (9)
  2. Ch 1; work 2 HDC in each HDC from previous round; SSTJ with 1st HDC. (18)
  3. Ch 1; work HDC in 1st HDC, 2 HDC in 2nd st [HDC in next st, 2 HDC in next st] repeat bracketed instructions to end, SSTJ. (27)
  4.  Ch 1; work HDC in 1st 2 HDC, 2 HDC in next st [HDC in next 2 st, 2 HDC in next st] repeat bracketed instructions to end, SSTJ. (36)
  5. Ch 1; work HDC in 1st 3 HDC, 2 HDC in next st [HDC in next 3 st, 2 HDC in next st] repeat bracketed instructions to end, SSTJ.  (45 for this and all subsequent rounds)
  6. Ch 1; SC in same st and every stitch below, SSTJ.
  7. Ch 1; SC in 1st st, DC in next st [SC in next st, DC in next st] repeat bracketed instructions to end; add one more SC; SSTJ.
  8. Ch 3 (counts as DC), SC in DC below, [DC in next SC below, SC in next DC below] repeat bracketed instructions to end, adding one DC at end; SSTJ.
  9. Ch 1;  SC in same st and every stitch below, SSTJ.
  10. Ch 1;  SC in same st; BLSC in every subsequent SC below, SSTJ
  11. Ch 1; HDC in same st and every subsequent SC below, SS behind the original ch 1.
  12. Ch 3 (counts as 1st FPDC); FPDC in every HDC below, SS behind the original ch 3.
  13. Ch 3 (counts as 1st FPDC); FPDC in every FPDC below, SSTJ.
  14. Ch 1; SC in same st and every subsequent st below, SSTJ
  15. Repeat round 14.  Tie off.

Sew in loose ends. Bribe someone to model it on Instagram.  

If you have any questions, please contact me.  


Tuesday, July 27, 2021

Updated: Rice stitch hat with ribbed top

Please note:  I make all my hat patterns free of charge to inspire crocheters to make hats for charity, particularly for Hat Not Hate.  Please feel free to redistribute this pattern, so long as you include this note and credit the pattern creator. Please visit my Ravelry store and consider purchasing a pattern that is not free.


More pics to come later.

Looking at the previous pattern for the rice stitch hat, I was not satisfied with the rice stitch pattern.  I am now combining steps from two previous posts to make the rice stitch hat with a ribbed top.

This works best with a DK yarn, or something on the lighter end of worsted.  The photos above show samples made with Ice Yarns Macaron, which is labeled as a 3/DK yarn, kindly provided by YarnNut.com.  Solids work best, but a self-striping yarn that doesn't take forever to change colors would also work. So would manual color change. A hook no larger than a 5 mm (H) is best.  

This earlier post (video tutorial included) gives further insight if these instructions are not clear.  For further insight into my wedge theory of crochet in the round, see this video tutorial.

  1. Complete your initial ring of 12 DCS. Create the initial ring in your favorite way--magic ring, ch4 & ss, ch2 and use the 1st ch as your ring--that's just you crocheting. Slip stitch to join (SSTJ) with the initial DC or initial ch3 that substituted for a DC.  (12 st)   
  2. For round 2 we need 2 stitches for each stitch below. Ch 3 in the top of the 1st DC (or ch3), then FPDC in the post of the same DC.  Repeat for each DC in round 1.  SS behind the ch3/initial DC to join. (24 st)
  3. Ch3, which counts as 1st FPDC. In FPDC from 1st wedge below, DC in top of next st, FPDC in post of same st.  For each succeeding wedge, FPDC in 1at st, DC + FPDC in 2nd st.  Each wedge has the pattern FPDC-DC-FPDC. SS behind the 1st ch3 to join.  (36 st)  
  4. Ch3 (counts as FPDC), DC in next st., DC in top of next st., FPDC around post of same st.  Repeat for each wedge.  Each wedge has the pattern FPDC-DC-DC-FPDC.  SS behind the initial ch 3 to join.  (48 st)
  5. Ch3 (counts as FPDC), DC in next st., FPDC in next DC, DC in top of next st., FPDC around post of same st.  Repeat for each wedge.  Each wedge has the pattern FPDC-DC-FPDC-DC-FPDC.  SS in top of the initial ch 3 to join.  (60 st)
  6. Ch 3 (counts as DC), FPDC around post of same DC/ch3, DC in next DC, FPDC in next FPDC, DC in next DC, FPDC in next FPDC.  Repeat for each wedge.  Each wedge has the pattern DC-FPDC-DC-FPDC-DC-FPDC.  SSTJ in the manner appropriate for the next round, which should be without any increases at all.  If the disc is too large, it is possible to omit this round without ill effects. In fact, for children's sizes this would also work with only 4 rounds. Take care that every round from here to the end contains the exact same number of stitches.
  7. If you did not work round 6 of the initial disc, ch 3 (still counts as 1st DC, forever and aye) and DC in every DC from previous round.  For the next round, ch 3, FPDC in post of next DC, [DC in next DC, FPDC in next DC] repeat bracketed instructions to end of round.  SSTJ.  If you did work round 6 of initial disc, omit this step. 
  8. For the succeeded rounds, work a DC in every FPDC from the previous round, and a FPDC around the post of every plain DC from the previous round.  Join the end of every round in a manner to indicate the 1st DC of the next round--if the first st in the next round is to be a FPDC, join behind the initial ch 3/DC of this round, but if the first stitch in the next round is to be a regular DC, join at the top of the initial ch 3/DC of this round.  Continue working until hat has reached desired size.
  9. Finish with a round of SC in every st.  Tie off.  Sew in loose ends.  Take selfie for Instagram.

Tuesday, June 22, 2021

Crystal Wave Hat


Crystal Wave Hat


Please note:  I make all my hat patterns free of charge to inspire crocheters to make hats for charity, particularly for Hat Not Hate.  Please feel free to redistribute this pattern, so long as you include this note and credit the pattern creator. Please visit my Ravelry store and consider purchasing a pattern that is not free.

The hat's inspiration comes from a tutorial that Crystal/Bag-O-Day Crochet posted for a new cowl pattern, featuring some amazing yarn from The Paw Ply Yarn Co..  I thought the stitch sequence would make a great hat, and based on an informal survey of yarnies, I decided on the name Crystal Wave Hat, to honor Crystal.

Yarn:  Any solid-color worsted weight yarn, such as Lion Brand Pound of Love.  Would also work with a DK weight yarn.   Approximately 105 yards/95 m.  Approximately 70 yards/64 m. of a primary color, 35 yards/32 m. of a highlight color.  Your mileage may vary.

Hook:  5.5 mm/I

Stitches:  Chain (ch), single crochet (SC), half-double crochet (HDC), double crochet (DC), slip stitch (SS) [SSTJ = slip stitch to join]

The best way to adjust size is to alter the hook size and/or yarn weight, because this pattern works best if the number of stitches in each round of the body is a multiple of 10 (5 rows x 12 st = 60)


Method:

Create initial disc:
  1. Using highlight color, ch 4, slip stitch to join (SSTJ) into a ring;  Ch 3 (counts as DC here and throughout), work 11 more DCs in the ring.  SSTJ in top of ch 3. (12 DC total, including ch 3). 
  2. Ch 3, DC in same stitch, 2 DC in each DC from previous round.  SSTJ in top of ch 3. (24 DC total) Change color for the next round.
  3. Using the primary color, ch 3, 2 DC in next st, [DC in next st, 2 DC in next st] repeat bracketed instructions to end of round.  SSTJ in top of ch 3.  (36 DC total)
  4. Ch 3, DC in next st, 2 DC in next st, [DC in next 2 st, 2 DC in next st] repeat bracketed instructions to end of round.  SSTJ in top of ch 3.  (48 DC total) Change color for the next round.
  5. Using highlight color, ch 3, DC in next 2 st, 2 DC in next st, [DC in next 3 st, 2 DC in next st] repeat bracketed instructions to end of round.  SSTJ in top of ch 3.   (60 DC total)
Please note, if you would like more information about how to crochet in the round like this, see my video tutorial here.


Body of hat:

  1. Staying with the highlight color, ch 1; SC in the st where you joined in the last round, and in every st of the round.  SSTJ in the 1st SC. When working a round of SC I find it useful to place a stitch marker in the 1st SC to make clear exactly where to join at the end and avoid confusion with the ch1.  (60 st in this and every subsequent round.)  Change to primary color.

    First section:
  2. Using primary color, ch1; SC in the st where you joined in the last round, HDC in next st, DC in next 5 st, HDC in next st, SC in next st, ch1, skip 1; [SC in the next st, HDC in next st, DC in next 5 st, HDC in next st, SC in next st, ch1, skip 1]  work bracketed instructions 5 times, SSTJ in the 1st SC.
  3. Repeat round 2. Change to highlight color
  4. Using highlight color, ch 1; SC in the st where you joined in the last round and in the next 8 stitches. If you are not in a position to make your next stitch into the ch1 spaces below, recheck your counting.  DC into the ch1 space 2 rows below. [SC in next 9 stitches, DC in ch 1 space 2 rows below.] Work bracketed instructions 5 times, SSTJ in 1st SC.  Change to primary color.

    Offset section:
  5. Using primary color, ch 3 (counts as DC), DC in next 2 st, HDC in next st, SC in next st, ch 1, sk 1.  For the offset to appear correct, the ch1 space must be aligned to the 3rd DC of the primary color section below. If not, recheck your counting. [SC in next st, HDC in next st, DC in next 5 st, HDC in next st, SC in next st, ch 1, sk 1] work bracketed instructions 4 times, ensuring alignment each time; SC in next st, HDC in next st, DC in next 2 st, SSTJ in top of ch3.
  6. Repeat round 5.  Change to highlight color.
  7. Using highlight color, ch 1; SC in the st where you joined in the last round and in the next 4 st.  If you are not in a position to make your next stitch into the ch1 spaces below, recheck your counting.  DC into the ch1 space 2 rows below. [SC in next 9 stitches, DC in ch 1 space 2 rows below.] Work bracketed instructions 5 times; SC in next 5 st, SSTJ in 1st SC.  Change to primary color.

  8. R 8,9,10:  repeat R 2,3,4
  9. Optional R 11,12,13:  repeat R 5,6,7
  10. Add a row of SC in either color.  

For the body of the hat, proper arrangement of the offset sections is crucial for the hat to look its best.  This is where counting is essential.  For each offset section to appear correctly, the 3rd DC of 5 must be directly above the border DC and ch spaces from previous rows, and the ch spaces and border DC must be directly above the 3rd DC of 5 in the previous rows.  
    Optional:  If you include the additional rounds in step 9, your hat might be long enough to look like a flapper hat.  Consider adding a crocheted flower or leaf in the highlight color as an ornament.

    Sew in loose ends.  Bribe someone to model it for Instagram pictures.  

    Please address any questions or comments to beardedyarndudes@deb8.biz.

    Sunday, June 6, 2021

    Another hat pattern!

     Alicia Stitch Hat

    This hat is an excellent accompaniment to my Alicia Shawl pattern, which at my Ravelry store here.

    Please note:  I make all my hat patterns free of charge to inspire crocheters to make hats for charity, particularly for Hat Not Hate.  Please feel free to redistribute this pattern, so long as you include this note and credit the pattern creator.

    All my links: https://linktr.ee/BeardedYarnDudes

    An earlier iteration.  
    Yarn:  Any solid or variegated DK or worsted weight yarn. I am quite fond of Lion Brand Jeans for this hat (see pics), but many others would work. I hesitate to recommend a self-striping yarn, unless the stripe is shorter than those found in Lion Brand Mandala, for example.  (Although I am exceedingly fond of Lion Brand Mandala for other patterns.)

    Hook:  5.0 (H) or 5.5 (I), or other hook to suit the yarn.


    Stitches:  

    • chain (ch) 
    • single crochet (SC)
    • back-loop single crochet (SC working in the back loop of the stitch rather than both loops)
    • half-double crochet (HDC)
    • double crochet (DC)
    • front-post double crochet (DC working around the post to push it forward, rather than the top of the stitch)
    • back-post double crochet (DC working around the post to push it back, rather than the top of the stitch)
    • slip stitch (SS)
    • chain 1 space (ch 1 sp)


    Hat top:

    Ch 4, slip stitch to join (SSTJ) with first ch, creating a ring; alternately use the magic ring

    1. ch 4 (counts as DC + ch), DC in the ring, ch1, [DC in the ring, ch1] repeat until there are 6 DCs and 6 ch 1 spaces, SSTJ in the 3rd ch of the ch 4 that began the round (6 DC + 6 ch 1 sp) 

    2. ch 4 (counts as DC + ch), DC in the ch where the SS from previous round is located, [ch1, DC in next ch 1 space, ch 1, DC in next DC] repeat until the last DC has been worked, ch 1 + DC in last ch 1 space, ch 1, SSTJ in 3rd ch of the ch 4 that began the round (12 DC + 12 ch 1 sp)

    3. ch 3 (counts as DC), 2 DC in next ch 1 sp, [DC in next DC, 2 DC in next ch 1 sp] repeat to the end of the round, SSTJ in top of ch 3 that began the round (36 DC)

    4. ch 3 (counts as DC), DC in next DC, 2 DC in next DC, [DC in next DC, DC in next DC, 2 DC in next DC] repeat to the end of the round, SSTJ in top of ch 3 that began the round (48 DC)

    5. ch 3 (counts as DC), DC in next 2 DCs, 2 DC in next DC, [DC in next 3 DCs, 2 DC in next DC] repeat to the end of the round, SSTJ in top of ch 3 that began the round (60 DC)

    6. ch 4 (counts as DC + ch 1), skip 1, DC in next DC, ch 1, skip 1, DC, ch 1, [DC in next DC, ch 1, skip 1, DC in next DC, ch 1, skip 1, DC, ch 1] repeat to end of round, SSTJ in 3rd ch of ch 4 that began the round (36 DC + 36 ch 1 sp)

    Measure your hat top after round 5. If the diameter is 7.5 in (19 (cm) the hat brim will measure 22-23 in (56-58 cm). If you omit round 6—or indeed, 5 and 6--it will have no negative effect on the final hat.

    Side of hat: 

    (each round has the same number of stitches as the last round of the top)

    1. Ch 4 (counts as DC + ch1), skip 1*,  [DC in next DC, ch 1, skip 1] repeat to end of round, SSTJ in 3rd ch of the ch 4 that began the round. Optional: omit this round, or work R 2 and then R 1.   *If previous round is all DC, skip 1 DC; if previous round alternates DC and 1 ch 1 sp, skip the ch 1 sp.
    2. Ch 3 (counts as DC), DC in every ch 1 sp and DC of previous round, SSTJ at top of ch 3 that began the round
    3. Ch 3 (counts as DC), DC in every DC of previous round, SSTJ at top of ch 3 that began the round 
    4. Ch 1, HDC in the same st where you worked a SSTJ, HDC in all remaining DC from previous round, SSTJ
    5. Ch 1, SC in the same st where you worked a SSTJ, BLSC in all remaining HDC from previous round, SSTJ
    6. Repeat R 1, working with SC from previous round
    7. Repeat R 2, work SSTJ behind the ch 3 that began the round, not in the top ch
    8. Ch 3 (counts as FPDC), BPDC in next DC, [FPDC in next DC, BPDC in next DC] repeat to end of round.  If more height is required, repeat this round.  SSTJ in top of ch 3 that began this round. If less height is required, omit this round entirely and consider working round 9 twice.
    9. Ch 1, SC in ch where you worked SSTJ in previous round, and in all remaining stitches from the previous round.  Tie off

    Sew in loose ends.  Bribe someone to model it for Instagram pictures.  

    Please address any questions or comments to beardedyarndudes@deb8.biz.


    Tuesday, May 25, 2021

    Crochet in the round with ribs!

    Mmmmm!  Ribs!  Yummy!

    Alas, I'm not talking about barbecued ribs today, but with the ribbing effect that can be achieved when crocheting in the round.  Normal crochet in the round is so mundane and boring, it is assumed everyone knows how to do it, but if you don't, here is a tutorial:


    To review, I start with a circle of 12 DCs;, which is the most common starting round I have seen.  Each of those 12 DCs is the point of a wedge--in the second round there are 2 DCs, in the third round 3 DCs, etc., each emanating from the initial DC.  That is how the required increases to create a true piece in the round are accomplished.

    But.

    Let us assume we want more texture, perhaps a texture to go along with the stitch that is used on the side of that hat.  Here is one way to accomplish that.

    1. Complete your initial ring of 12 DCS. I don't care how the ring is accomplished--magic ring, ch4 & ss, ch2 and use the 1st ch as your ring--that's just you crocheting. Slip stitch to join (SSTJ) with the initial DC or initial ch3 that substituted for a DC.  (12 st)
    2. For round 2 we need 2 stitches for each stitch below. Ch 3 in the top of the 1st DC (or ch3), then FPDC in the post of the same DC.  Repeat for each DC in round 1.  SS behind the ch3 to join. (24 st)
    3. Ch3, which counts as 1st FPDC. In FPDC from 1st wedge below, DC in top of next st, FPDC in post of same st.  For each succeeding wedge, FPDC in 1at st, DC + FPDC in 2nd st.  Each wedge has the pattern FPDC-DC-FPDC. SS behind the 1st ch3 to join.  (36 st)
    4. Ch3 (counts as FPDC), DC in next st., DC in top of next st., FPDC around post of same st.  Repeat for each wedge.  Each wedge has the pattern FPDC-DC-DC-FPDC.  SS behind the initial ch 3 to join.  (48 st)
    5. Ch3 (counts as FPDC), DC in next st., FPDC in next DC, DC in top of next st., FPDC around post of same st.  Repeat for each wedge.  Each wedge has the pattern FPDC-DC-FPDC-DC-FPDC.  SS in top of the initial ch 3 to join.  (60 st)
    6. Ch 3 (counts as DC), FPDC around post of same DC/ch3, DC in next DC, FPDC in next FPDC, DC in next DC, FPDC in next FPDC.  Repeat for each wedge.  Each wedge has the pattern DC-FPDC-DC-FPDC-DC-FPDC.  SSTJ in the manner appropriate for the next round, which should be without any increases at all.
    You can now continue with the ribbing for the entire vertical portion of the hat, or you can execute a rice stitch by alternating FPDC in every DC from the previous round, and DC in every FPDC from the previous round.  The choice is entirely yours!


    Hat with ribbed top
    Hat with flat top

    Friday, May 21, 2021

    New hat pattern!

    Rice Stitch Hat


    Please note:  I make all my hat patterns free of charge to inspire crocheters to make hats for charity, particularly for Hat Not Hate.  Please feel free to redistribute this pattern, so long as you include this note and credit the pattern creator. Please visit my Ravelry store and consider purchasing a pattern that is not free.

    Yarn:  Any worsted weight yarn, such as Lion Brand Pound of Love.  Would also work with a DK weight yarn.   Approximately 105 yards/95 m.
    Hook:  5.5 mm/I

    Stitches:  Chain (ch), single crochet (SC), double crochet (DC), front-loop double crochet (FLDC), slip stitch (SS)

    Size can be adjusted by altering the number of circle rounds and rows of rice stitch.  You could also use different sizes of yarn or hook sizes.  If you use a different number of rounds for the circle, make sure you join at the end of the last round in the manner described in step 5 below.


    Method:


    Create initial disc:
    1. Ch 4, slip stitch to join (SSTJ) into a ring.  
    2. Ch 3 (counts as DC here and throughout), work 11 more DCs.  SSTJ in top of ch 3. (12 DC total, including ch 3)
    3. Ch 3, DC in same stitch, 2 DC in each DC from previous round.  SSTJ in top of ch 3. (24 DC total)
    4. Ch 3, 2 DC in next st, [DC in next st, 2 DC in next st] repeat bracketed instructions to end of round.  SSTJ in top of ch 3.  (36 DC total)
    5. Ch 3, DC in next st, 2 DC in next st, [DC in next 2 st, 2 DC in next st] repeat bracketed instructions to end of round.  SSTJ in top of ch 3.  (48 DC total)
    6. Ch 3, DC in next 2 st, 2 DC in next st, [DC in next 3 st, 2 DC in next st] repeat bracketed instructions to end of round.  SS behind ch 3 to join.  (60 DC total)

    Body of hat:
    1. Ch 3 (counts as FPDC), DC in next st, [FPDC in next st., DC in next st.] repeat bracketed instructions to end of row, SSTJ in top of ch 3. 
    2. Ch 3, FPDC in next st, [DC in FPDC below, FPDC in DC below] repeat bracketed instructions to end, SS behind ch 3 to join.
    3. Ch 3, DC in next st, [FPDC in next DC below, DC in FPDC below] repeat bracketed instructions to end of row, SSTJ in top of ch 3. 
    4. Repeat rows 2 and 3, until hat has reached desired size. Whether you end on a row 2 or a row 3 does not matter.
    5. Ch 1.  SC in same st, and in every st below. SSTJ in 1st  SC (60 SC)
    6. Repeat previous row.  Tie off.


    Sew in loose ends.  Bribe someone to model it for Instagram pictures.  

    Please address any questions or comments to beardedyarndudes@deb8.biz.

    Sunday, May 16, 2021

    A new pattern--April Rectangle Shawl

    Everybody and her sister has been creating ponchos recently, so I had to jump on the bandwagon.  I came up with this easy poncho, and it is now available on my Ravelry store:


    Wednesday, March 31, 2021

    Hugs & Kisses Hat

    Please note:  I make all my hat patterns free of charge to inspire crocheters to make hats for charity, particularly for Hat Not Hate.  Please feel free to redistribute this pattern, so long as you include this note and credit the pattern creator.


    This hat uses the hugs & kisses (or Xs and Os) stitch.  This would be a great complement to the Hugs & Kisses Scarf available on Ravelry and Etsy.

    Yarn:  Any worsted weight yarn, such as Lion Brand Pound of Love.  Would also work with a DK weight yarn.

    Hook:  5.5 mm/I

    Stitches:  Chain (ch), single crochet (SC), back loop single crochet (BLSC), double crochet (DC), slip stitch (SS)

    Puff stitch:  There are many types of puff stitches, but this is the type for this pattern—DC4tog ([YO, insert, pull through loop, YO, pull through 2 loops] work bracketed instructions 4 times for a total of 5 loops remaining on the hook; YO, pull through all 5 loops), ch1

    Cross stitch:  Skip 1, DC in next st or sp, DC in the skipped st or sp, working behind the DC just worked.


    Method:

    Create initial disc:

    1. Ch 4, slip stitch to join (SSTJ) into a ring.  Ch 3 (counts as DC here and throughout), work 11 more DCs.  SSTJ in top of ch 3. (12 DC total, including ch 3)
    2. Ch 3, DC in same stitch, 2 DC in each DC from previous round.  SSTJ in top of ch 3. (24 DC total)
    3. Ch 3, 2 DC in next st, [DC in next st, 2 DC in next st] repeat bracketed instructions to end of round.  SSTJ in top of ch 3.  (36 DC total)
    4. Ch 3, DC in next st, 2 DC in next st, [DC in next 2 st, 2 DC in next st] repeat bracketed instructions to end of round.  SSTJ in top of ch 3.  (48 DC total)
    5. Ch 3, DC in next 2 st, 2 DC in next st, [DC in next 3 st, 2 DC in next st] repeat bracketed instructions to end of round.  SSTJ in top of ch 3.  (60 DC total)


    Body of hat:

    1. Ch 1, SC in same stitch and every stitch in previous round.  SSTJ in 1st SC (60 SC)
    2. Ch 3, sk 1, puff stitch in next st, cross stitch in next 2 st., [DC in next st, sk 1, puff stitch in next st, cross stitch in next 2 st] repeat bracketed instructions to end of row.  SSTJ in top of ch 3.
    3. Ch 3, cross stitch using spaces on either side of puff stitch below, puff stitch in space between DCs of cross stitch below, [DC in next st, cross stitch using spaces on either side of puff stitch below, puff stitch in space between DCs of cross stitch below] repeat bracketed instructions to end.  SSTJ in top of ch 3.
    4. Ch 3, puff stitch in space between DCs of cross stitch below, cross stitch using spaces on either side of puff stitch below,  [DC in next st, puff stitch in space between DCs of cross stitch below, cross stitch using spaces on either side of puff stitch below repeat bracketed instructions to end.  SSTJ in top of ch 3.
    5. Repeat R. 3 & 4.  Repeat R. 3.
    6. Ch 1.  SC in same st, and in every st below. SSTJ in 1st  SC (60 SC)
    7. Repeat step 6.  (Optional:  Repeat a second time.  Also optional:  make 2nd and 3rd iterations of SC row BLSC.)  Tie off.

    Sew in loose ends.  Bribe someone to model it for Instagram pictures.  

    Free PDF download here.


    Please address any questions or comments to beardedyarndudes@deb8.biz.


    Tuesday, March 23, 2021

    Accidental Hat Design


    Please note:  I make all my hat patterns free of charge to inspire crocheters to make hats for charity, particularly for Hat Not Hate.  Please feel free to redistribute this pattern, so long as you include this note.

    Bottom-up ribbed hat

    While working on a hat designed by another, I added more and more variation as I crocheted.  I soon realized I liked my variations more than the pattern I was working with, and voila! I had a hat of my own design! This design borrows only the bottom/hem start from the original pattern.  I’ve seen many top-down ribbed hat patterns, but this is the first bottom-up ribbed hat pattern I’ve seen.

    Yarn:  Worsted (4) weight, such as Wal-Mart Mainstay or Caron One Pound; use other yarns if desired. 

    This pattern works well with solids and variegated colors.  I haven’t tested with self-striping yarn, but I suspect the user would be better off manually controlling color in order to produce stripes than using self-striping yarns.

    Hook:  J (6mm); if other yarns are used, size up at least 1 mm from the recommended hook specified by the yarn manufacturer

    Special stitches or stitch patterns:

    It is assumed the reader is familiar with front-post double crochet (FPDC)

    For decreases (FPdec), rather than using the tradition DC2tog, simply perform a FPDC using two front posts from previous row.

    SSTJ = slip stitch to join

    [: :] = repeat sign in music.  Repeat what is within the brackets the number of times indicated.

    Method:

    All measurements and counts are given in ranges. User must determine correct measurement/count for the intended end user.  Hat can be either tight-fitting beanie or slouch hat, depending on number of rounds worked.

    Measure circumference of a hat that fits the head you intend to cover.  (Or the head itself.)  Usually this is 20-21 inches, but there is no wrong answer.

    1. Create a chain as long as the circumference you measured, usually 58-62 ch.  Ensuring the chain is not twisted, slip stitch to join (SSTJ); ch1
    2. Single crochet (SC) in every chain; SSTJ, ch1*
    3. Double crochet in every SC; SSTJ, ch1
    4. FPDC in every DC; SSTJ, ch1  [Hint:  For any FPDC row, especially the first, ensure you have drawn enough yarn through before you complete the stitch. This is the best way to avoid curling of the fabric.]
    5. Repeat step 4 until work measures 5-6 inches or until desire pre-decrease height is achieved..
    6. [:FPDC in next (or first) 4 st., FPdec in next 2 st.:] repeat until end, FPDC any st. that remain; SSTJ, ch1 OR see alternative procedure below.
    7. FPDC in every st.; SSTJ, ch1
    8. Repeat step 7 until work measure 7-8 inches or other desired height; SSTJ, ch1
    9. FPdec in every 2 st.; if one FPDC remains, FPDC in that st.; SSTJ, ch1
    10. Repeat step 9, SSTJ.   Tie off, leaving tail long enough for sewing top together.
    11. Using tapestry/yarn needle and the long tail left from step 10, st. in top of every stitch.  Pull together gently to avoid breaking yarn.
    12. Make additional stitches ad lib. to secure yarn.  It is useful to do steps 11 and 12 from the inside of the hat.

    Optional steps 6ff for a long, slow decrease:

    1. [:FPDC 10 st., FPdec in next 2 st.:] repeat until end, FPDC any st. that remain; SSTJ, ch1
    2. [:FPDC 9 st., FPdec in next 2 st.:] repeat until end, FPDC any st. that remain; SSTJ, ch1
    3. [:FPDC 8 st., FPdec in next 2 st.:] repeat until end, FPDC any st. that remain; SSTJ, ch1
    4. [:FPDC 7 st., FPdec in next 2 st.:] repeat until end, FPDC any st. that remain; SSTJ, ch1
    5. [:FPDC 6 st., FPdec in next 2 st.:] repeat until end, FPDC any st. that remain; SSTJ, ch1
    6. [:FPDC 4 st., FPdec in next 2 st.:] repeat until end, FPDC any st. that remain; SSTJ, ch1
    7. [:FPDC 2 st., FPdec in next 2 st.:] repeat until end, FPDC any st. that remain; SSTJ, ch1
    8. [:FPdec in next 2 st.:] repeat until end, FPDC any st. that remain; SSTJ, tie off
    9. Using tapestry/yarn needle and the long tail left from step 8, st. in top of every stitch.  Pull together gently to avoid breaking yarn.
    10. Make additional stitches ad lib. to secure yarn.  \


    Sew in loose ends.  Optional:  Add a pom-pom, if desired.

    Bribe someone to model the hat for Instagram pictures.  


    *It is possible to start with the round of DC and add the round of SC after completing the hat, but the only reason I can imagine for doing this is to use a different yarn. Even that could be accomplished by manually changing the yarn.


    Please address any questions or comments to beardedyarndudes@deb8.biz.


    David's Hat

     Imported from my old blog, Goods and Chattels:


    Please note:  I make all my hat patterns free of charge to inspire crocheters to make hats for charity, particularly for Hat Not Hate.  Please feel free to redistribute this pattern, so long as you include this note.


    I named this hat after my friend David, who lives in Dallas, which has had very bad winter weather lately, and who also travels frequently to Germany.  

    Yarn:  Any worsted weight yarn.  I tend to favor budget yarns like Walmart's Mainstay brand or Hobby Lobby's Crafter's Secret.  I've never made my love for Lion Brand yarns a secret!

    Hook:  H (5 mm) or I (5.5 mm)


    Stitches:

    Expanded half double crochet (EHDC):  YO, insert, pull through loop, YO, pull through 1 loop on hook, YO, pull through remaining 3 loops on hook

    Linked double crochet (LDC):  Starting from previous DC, do not YO, but rather insert through lowest loop of DC, insert through stitch being worked, pull through loop, YO, pull through 2 loops on hook, YO, pull remaining through 2 loops. on hook

    Linked double crochet 2 together (LDC2tog):  Starting from previous DC, do not YO, insert through lowest loop of DC, insert through 1st stitch being worked, pull through loop, YO, pull through 2 loops on hook, insert though lowest loop just worked, insert through next stitch, YO, pull through 2 loops on hook, YO, pull through remaining 3 loops on hook

    (Linked DC is very well demonstrated in this video by Bitchin' Stitches:  https://youtu.be/38ieabUwGvc )

    SSTJ:  slip stitch to join


    Method:

    ch 7 (9)

    1. SC in 2nd ch from hook and every ch to the end (6/8)
    2. Ch 1, turn;  using back loop only, SC in every stitch
    3. Repeat step 2 until desired length is reached.  This should almost reach around the head of the wearer, so that by stretching the two ends  meet.  (Exact row count matters less than fit of the band.)  Do not tie off.
    4. Join the two ends of the band together with SC or other method, ch1, turn work so that the edge of the band is accessible
    5. SC in the side of every SC row in the band, SSTJ, ch1, turn work so that join is on the inside
    6. EHDC in every SC, SSTJ, ch 1
    7. EHDC in every EHDC, SSTJ, ch1
    8. SC in every EHDC, SSTJ, ch1
    9. DC in 1st st, LDC in next 9 st, LDC2tog in next 2 st, [:LDC in next 10 st, LDC2tog in next 2 st:] repeat to end, LDC in any remaining st, SSTJ, ch1
    10. DC in 1st st, LDC in next 8 st, LDC2tog in next 2 st, [:LDC in next 9 st, LDC2tog in next 2 st:] repeat to end, LDC in any remaining st, SSTJ, ch1
    11. DC in 1st st, LDC in next 7 st, LDC2tog in next 2 st, [:LDC in next 8 st, LDC2tog in next 2 st:] repeat to end, LDC in any remaining st, SSTJ, ch1
    12. DC in 1st st, LDC in next 6 st, LDC2tog in next 2 st, [:LDC in next 7 st, LDC2tog in next 2 st:] repeat to end, LDC in any remaining st, SSTJ, ch1
    13. DC in 1st st, LDC in next 5 st, LDC2tog in next 2 st, [:LDC in next 6 st, LDC2tog in next 2 st:] repeat to end, LDC in any remaining st, SSTJ, ch1
    14. DC in 1st st, LDC in next 3 st, LDC2tog in next 2 st, [:LDC in next 4 st, LDC2tog in next 2 st:] repeat to end, LDC in any remaining st, SSTJ, ch1
    15. DC in 1st st, LDC in next st, LDC2tog in next 2 st, [:LDC in next 2 st, LDC2tog in next 2 st:] repeat to end, LDC in any remaining st, SSTJ, ch1
    16. DC in 1st st, [:LDC2tog in next 2 st:] repeat to end, LDC in any remaining st, SSTJ, ch1, tie off
    17. Using loose end from step 16, sew in every st. to close up top
    18. Use additional stitches to secure end
    19. Bribe someone to pose for Instagram pictures